Uncategorized
Decoupage On Galvanized Metal Buckets By Vidhu Thareja
Jul
Hi everyone, Vidhu Thareja here once again with another tutorial for this month. I hope all of you are having a great crafting time. Summers and rains means to me, staying indoors most of the time and crafting is the best way for me to kill time and to beat the heat. It keeps me energetic.
I would like to thank once again Connect4Sale for giving me this golden opportunity of Guest DT. Today I am sharing step wise tutorial of altered Galvanized Metal Buckets, recently introduced by Connect4Sale. These buckets can be turned into home décor piece or outdoor décor piece using decoupage, mixed media. These buckets can be used to place indoor plants, as ice buckets, as cutlery holder or can be hanged in balcony, possibilities are endless.
I personally love doing decoupage and when I received two such buckets in my Guest DT kit, I decided to alter them using decoupage technique. Vintage never goes out of fashion so I have decided to give vintage look to one bucket. So lets start our projects.
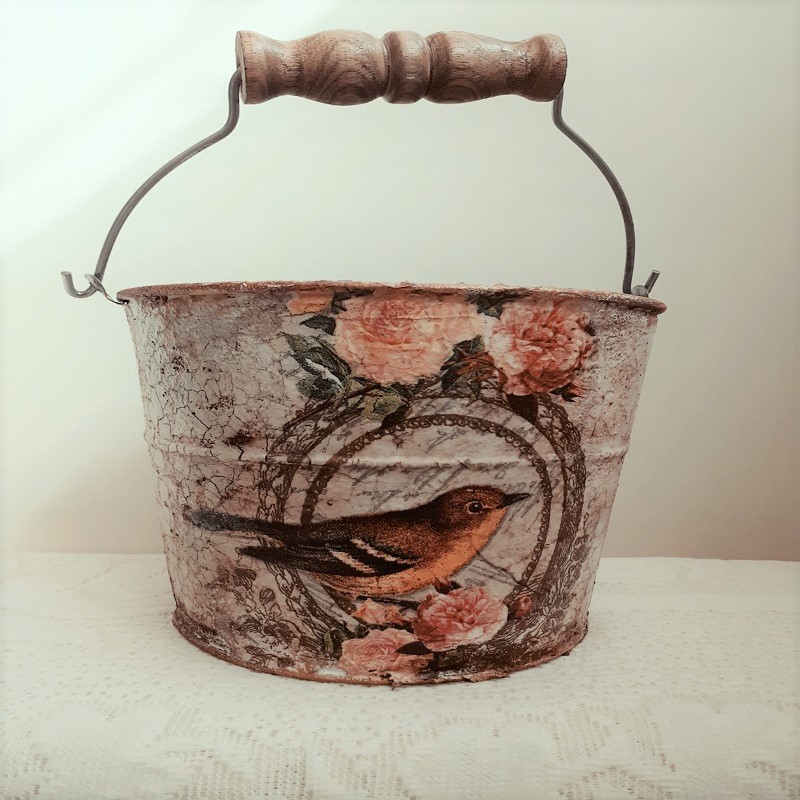
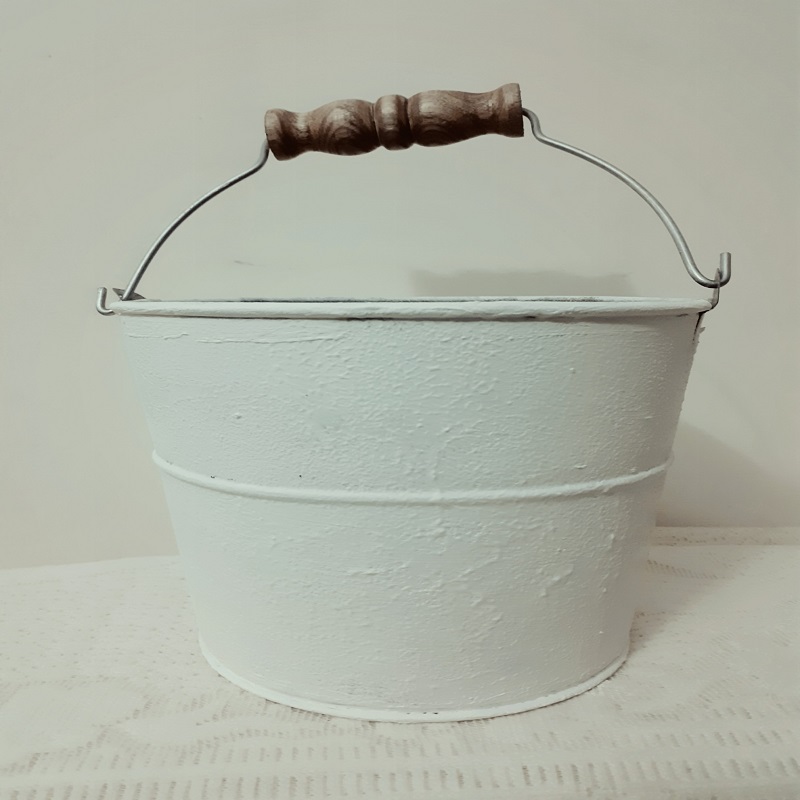
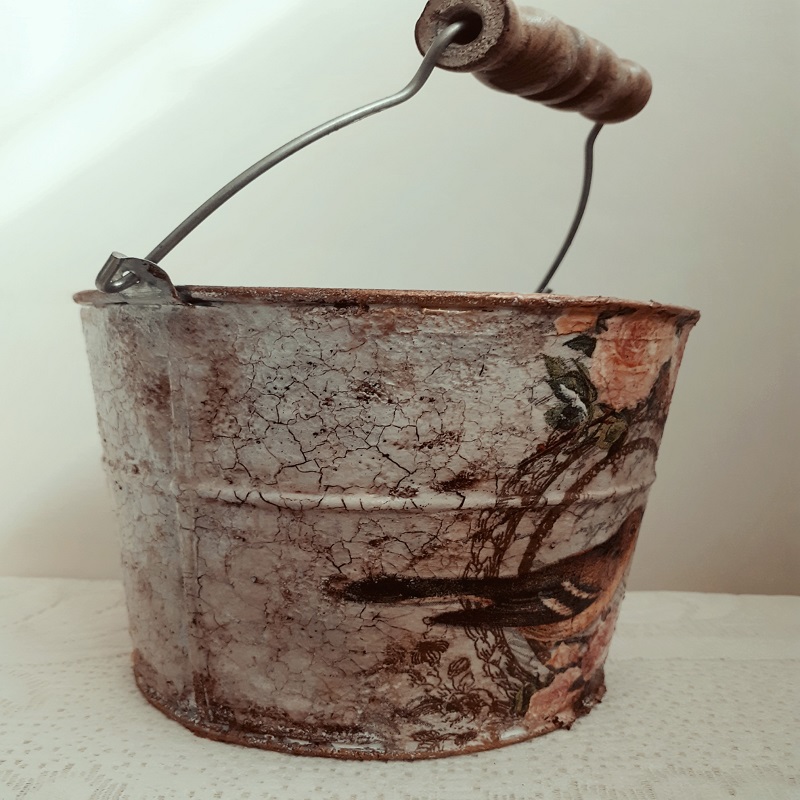
On my first bucket I have used a beautiful tissue from my stash which I have bought from Connect4Sale. Tissues are my weakness and I love the collection of tissues, available at Connect4Sale. First step is to create a base on bucket. Always clean your base like metal, glass with rubbing alcohol to make the base free from any dust particle. As we need white base for decoupage, I have applied one coat of gesso with sponge dauber to avoid brush stroke and to achieve uniform finish. I let it dry and then I apply one coat of Folk Art White chalk paint. Always create a base with white chalk paint or gesso, before doing decoupage with tissue. White base enhances the beauty of tissue, no matter what is the base color of the tissue.
Then I have sanded the surface with fine sand paper. Now it is turn to decoupage the tissue. I wanted to use only image from the tissue, so I have used wet brush technique to remove image from the entire tissue. I have used the image on two sides of the bucket. First I see the placement of the image on bucket. This is very important step for decoupage. Then I have removed the top printed layer from rest of the plain layers. I have used Mod Podge Matte to adhere the tissue. Use minimum glue, when you are using tissue for decoupage because tissues are very thin and delicate and excessive glue will form wrinkles. I place image and while holding it with another hand I apply very little Mod Podge on a small portion. I paste tissue and smooth the tissue gently with hand. I paste the whole image. Then I place polythene on top of decoupaged image and press it from inward to outword direction to remove air bubbles. I decoupage the image on the other side of the bucket. I leave it to dry and then I seal the image with one coat of Mod Podge.
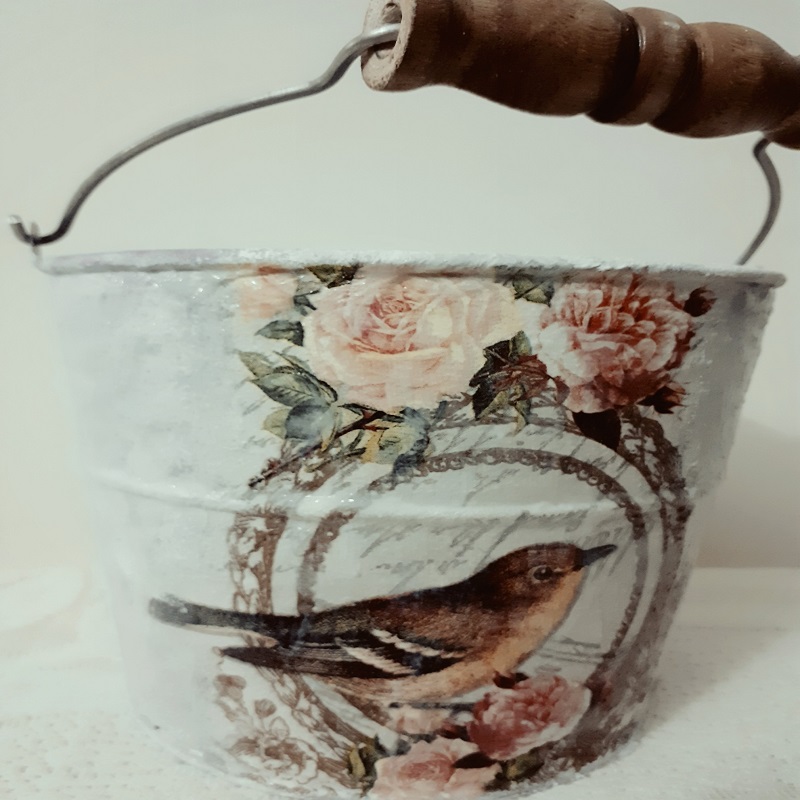
Now it is time to do some color blending around the image. Color combination plays an important role in decoupage always choose colors very carefully. Select colors in combination with your image. Chalk paints gives better finish in color blending. Always use lighter shade of color around the image because darker shades could suppress the beauty of the image. I have done color blending using sponge dauber. I wanted to give vintage look to my project so I have decided to give it a crackle effect. I have used 2 step crackle medium, which comes in set of two bottles- base coat and top coat. 2 step crackle medium works on any type of surface. Here patience is the key. Let crackle medium dry naturally. Do not use any heat dryer or heat tool to speed up the drying process. I apply base coat of crackle medium with the help of synthetic brush. I always apply less quantity of medium on top of image. I left it to dry naturally on its own. It takes few hours to dry, depending upon room temperature. When it got dried I apply top coat of crackle medium. Always keep the direction of the brush same while applying both the mediums. I have applied thick coat of top coat in the same manner. I let it dry. Top coat also takes few hours to dry. When I am satisfied that top coat has dried properly, then I use oil color to highlight the cracks. Take out a small quantity of oil color on a small piece of dry cloth and rub gently and wipe it with another piece of cloth. Complete the whole surface like this, gradually rubbing the oil color and wiping off the exccess oil color. As you wipe the oil color, you will see the beautiful cracks appearing and creating a vintage look. You can use metallic wax also to enhance the cracks. Our beautiful bucket with vintage look is ready to adorn the house. There is not much need to apply varnish since we have already sealed the tissue and we have used oil color also.
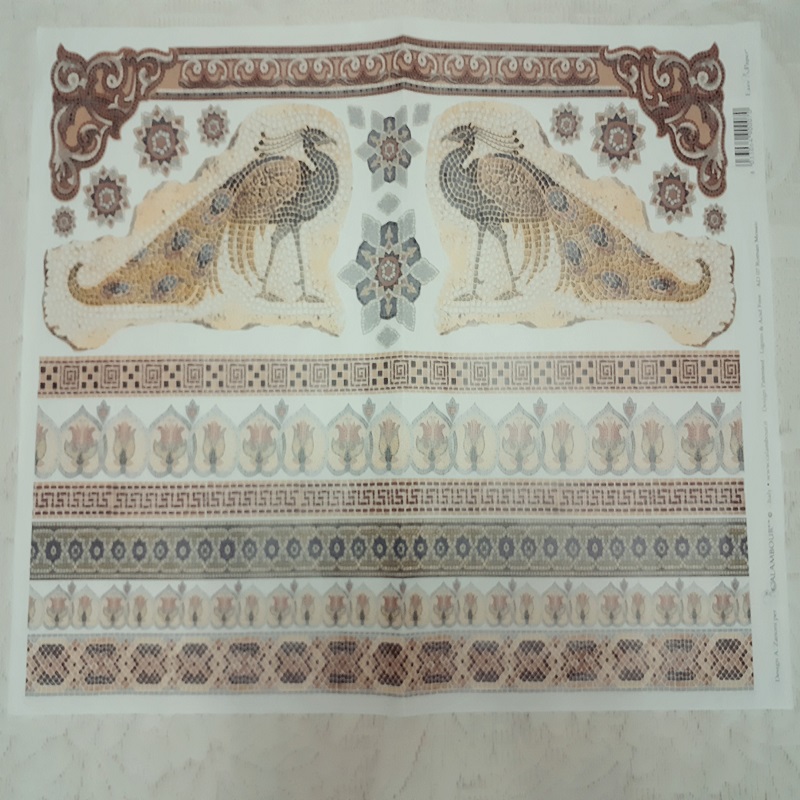
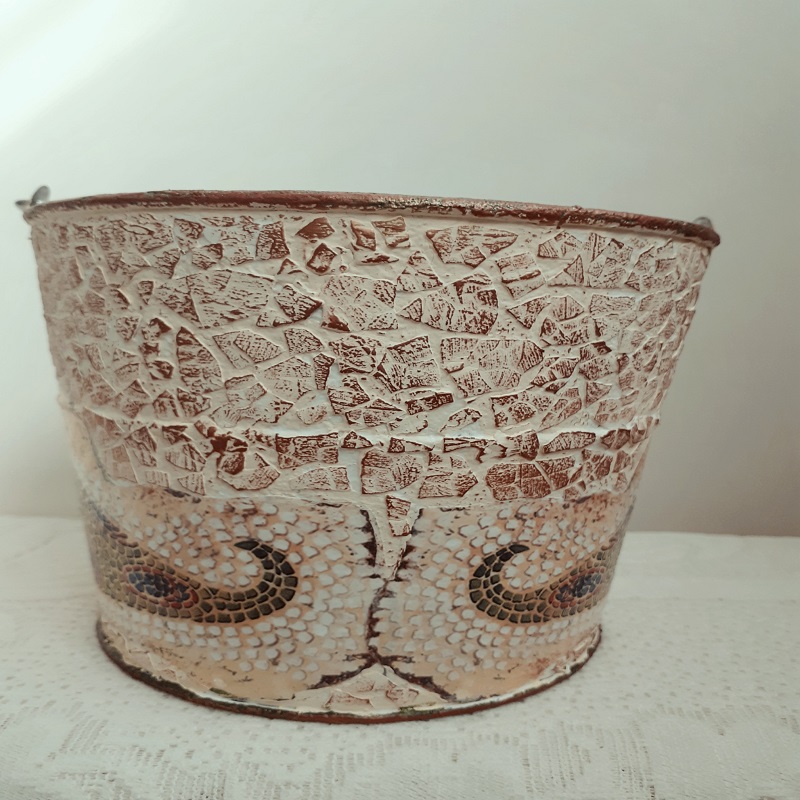
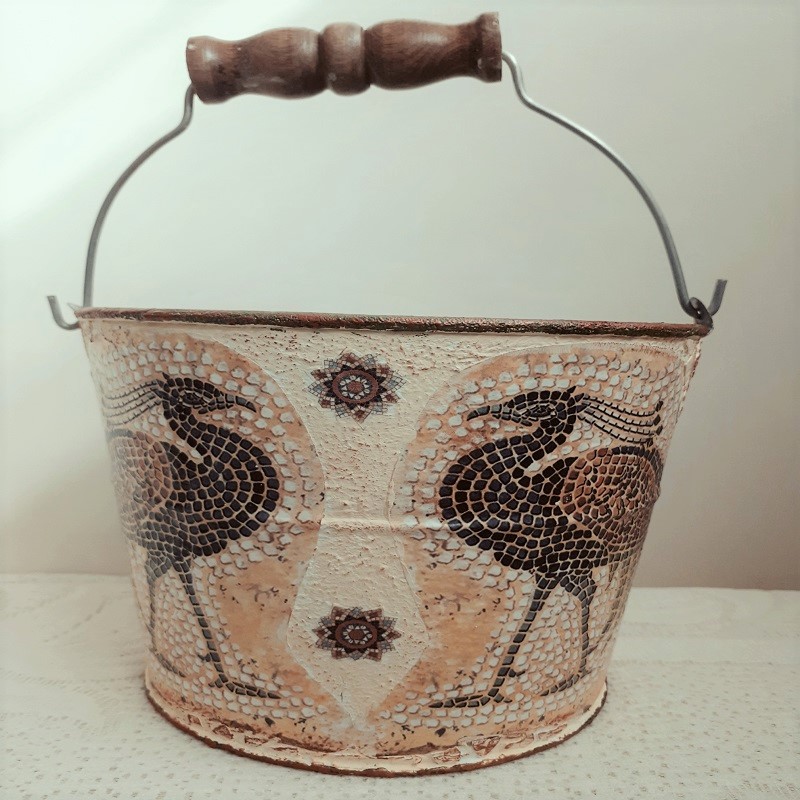
I have received two such buckets and beautiful Calambour decoupage rice paper in my Guest DT kit so I have decided to use that paper on the second bucket. The peacocks looks perfect for the bucket so I have done fussy cutting. I will use rest of paper on my another project. On this bucket also I have created white base using one coat of gesso and second coat of Folk Art chalk paint. Then I see the placement of image and using Mod Podge Matte I pasted images of peacocks facing each other. I leave to dry and then seal the image with a coat of Mod Podge. I have decided to create some background texture and for that I have used egg shells. You can create texture with the help of modelling paste or texture paste using any background stencil. I have pasted egg shells using modpodge. This is creating a brick wall effect and perfectly going with the images also.

I left it to dry. Now its time to do some color blending. On this project also I have used chalk paint. Around the image I have used sponge dauber but while doing color blending I have used flat brush on the textured surface. I wanted to enhance that background texture so I have decided to use Inka Gold for the purpose. Any type of metallic wax can be used. I have used copper and gold colors of Inka Gold. I have rubbed wax with my finger to achieve that desired look. I let it dry for sometime and then finally seal the whole bucket with Aquadur PU of Asain Paints.
A beautiful bucket is ready to adorn your house. It is said that Happiness is Handmade. So create with your own hands, something unique and beautiful and spread happiness. Get these buckets for yourself and decorate your lovely home with your handmade creations. Do not forget to share your lovely creations with all of us.
About The Artist
Vidhu Thareja is a crafter from Noida, born and brought up in Delh. She had completed her studies from Delhi. She began her career as a freelance translator and worked with many reputed publications. She has also worked in the Insurance Sector for many years.
Due to personal reasons she had to give up her job, which actually turned out to be a blessing in disguise. The turning poing came when she got the golden opportunity to work with Madura Coats Pvt. Ltd. as a Craft Consultant for their Anchor Thread Craft activities in reputed schools of Delhi/ NCR Region. Although it was not a very high paying job it gave her all the confidence and a feeling of fulfillment, which made her realize the crafter hidden in her.
Since her childhood she was very much interested in crafts. Growing up, there was not that much exposure to tv or computer and she used to do embroidery in her free time or during vacations. Her biggest inspiration was her mother who is her motivating force. At the time of conducting Anchor thread craft workshops, she started doing DIY activities and decided to learn more.
From then there was no looking back and today she is doing what she loves to do. Although every new technique and art form attracts her but Decoupage and Sospeso are the two crafts, that she enjoys the most. She never lost a chance to learn anything new because she believes that learning never stops.
She follows her fellow crafters because she feels every person teaches you something. To all upcoming crafters she has this to say “That whatever you do, do it with love and passion, follow others but make your own style statement. Be confident but never be over-confident. Share your knowledge, that is what makes you grow”.
You can follow Vidhu Thareja on her Facebook and Instagram on the below mentioned links…
Vidhu’s Crafts – Making Crafts From Heart
https://www.instagram.com/vidhus_craft_handmade/