Sorry, nothing in cart.

Decoupage On Metal Bucket by Vidhu Thareja
- /
Hello everyone, Vidhu Thareja here once again on the blog of Connect4Sale with new projects to share with all the craft lovers. First of all I want to thank Connect4Sale for giving me this wonderful opportunity to be a guest DT.
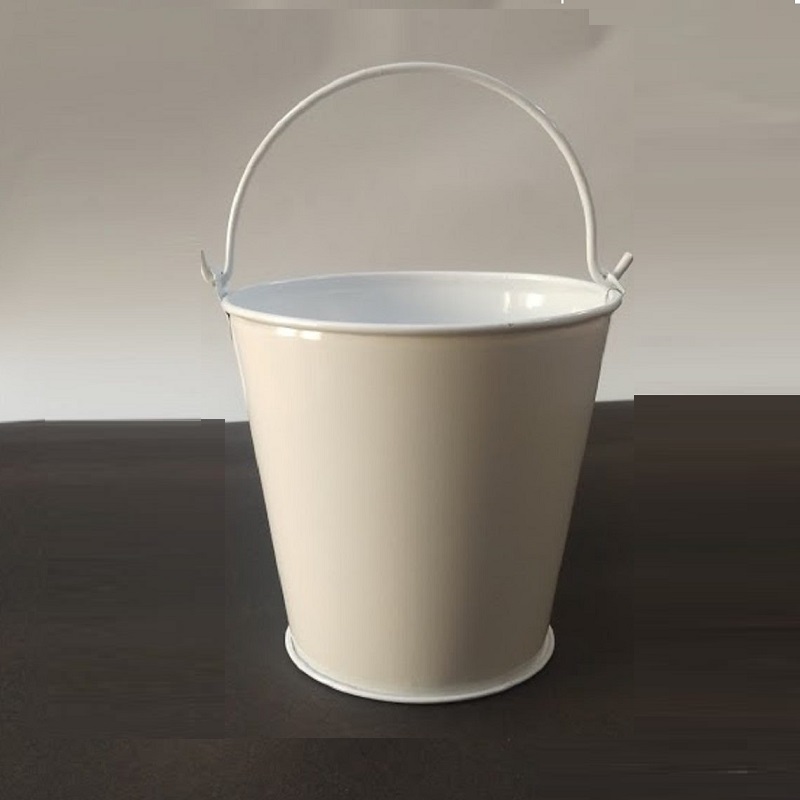
Today I am sharing step wise picture tutorial of altered white metal buckets, recently introduced by Connect4Sale. These buckest can be turned into beautiful home décor piece using decoupage, doodle art, mixed media. They can be used on tables, as wall hangings, kitchen décor or return favours; possibilities are endless.

I personally love doing decoupage so when I received two buckets in my guest DT kit, I decided to alter them with two different techniques. So lets start…..
My first project is image transfer. These days image transfer techniques is getting very popular. You can personalize anything with this technique. Since I was using black and white image, so I decided to keep my base white. If you want to color the base, use any light shade of chalk paint. First I had applied 2 coats Folk Art white chalk paint with the help of sponge. I let it dry completely. I have Stamperia Image transfer sheets in my stash, which I had received from Connect4Sale in my guest DT kit.

These sheets come in the set of two co-ordinating sheets. I have used one image from the set. I have done fussy cutting of the image, as close to the outline of the image. This is a very exciting technique, all you need is patience. I have used Modpodge Matte in this project, also available at Connect4Sale. I have applied sufficient amount of Mod Podge on the printed side of the paper, which we will paste face down. Apply modpodge evenly to cover the whole image. I have applied Mod Podge on that area of bucket, where I was going to paste the image. So mark the area, where you need to paste the image. If you are doing image transfer directly on the surface, without any base coat, then apply Mod Podge only on image.

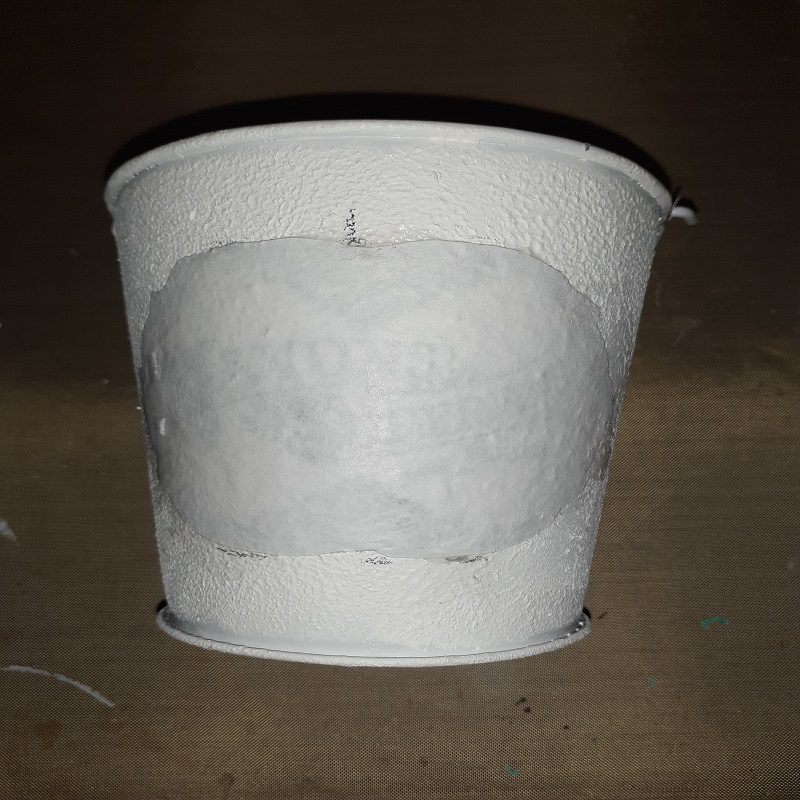
I slowly placed the image on the surface and pressed it gently with hand to ensure that there would be no air bubble. Smooth the image from inward to outward direction. Then leave it to dry for atleast 12 hours or so.

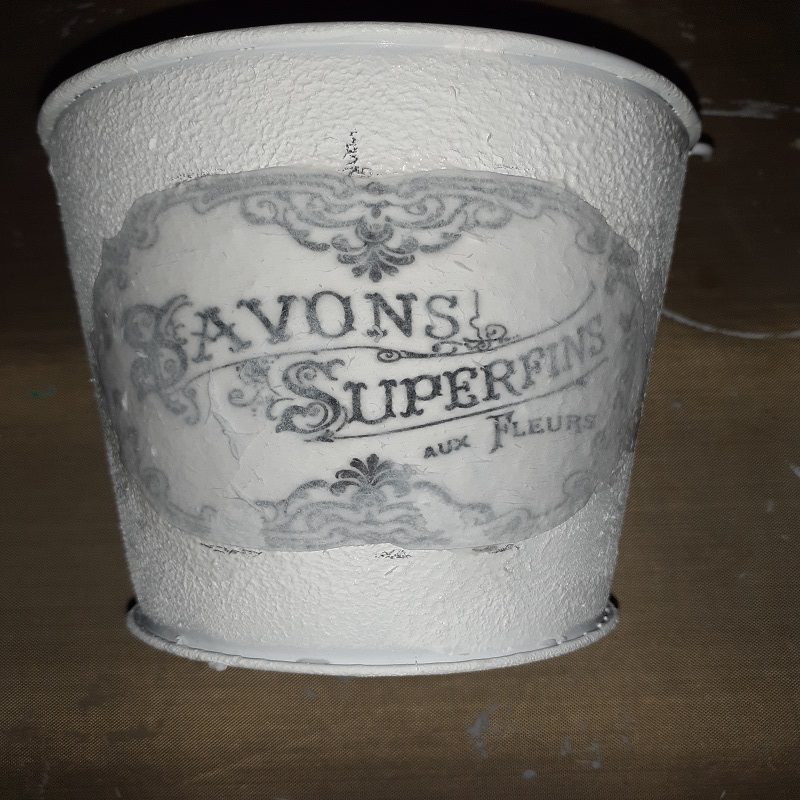
Now it is turn to remove layers from the image. Be gentle here. Wet your fingers and start rubbing the paper in circular motions. Remember here we need to remove layer by layer. Start from one end and complete the whole image. Keeps on removing the paper, until you see the final image. When you are satisfied that the image got transferred, seal it with one coat of Mod Podge. I wanted to enhance the look of the bucket so I have applied black chalk paint on the rim and at the bottom of the bucket. It is advisable to use chalk paint on the surface like metal because acrylic color will not adhere properly and will start peeling off. Folk Art And ICraft chalk paints are available at Connect4Sale.

On the area where I have applied black paint, I have done some dry brushing with silver metallic color. The bucket was looking little plain to me so have done some stamping using script stamp with Black Archival Ink. Archival ink are permanent inks, which do not react with water based glue, varnish etc. This script stamp is in perfect combination with my image. Finally I have applied a final coat of water based varnish – Aquadur PU of Asain Paints. A beautiful décor piece is ready.

On the second bucket I decided to do decoupage using Stamperia rice paper, which I have received in my guest DT kit. It is an awesome product to use. You will get a variety of designs in rice paper, available at Connect4Sale. Since the bucket is small in size and rice paper has different images, so I decided to use two coordinating images. I have used wet brush technique for better blending of image with the base.

Take a zero number round brush and wet the bristles and remove the image from a distance using the wet brush. I avoided using scissors for such projects where I need to blend the image. Scissors give crisp edges which we do not require. I have applied two coats of folk art white chalk paint with the help of sponge dauber. It gives even coverage. I let it dry. Then I see the placement of images on the bucket. It is very important to see the placement of images, before pasting it. Rice paper is used in same way, like we use tissue. The only difference is that rice paper is not thin as tissue. Now I place first image on bucket and paste it, using Mod Podge Matte. Then I decoupage the second image also. I leave it to dry for few minutes.

Now it is turn to blend some colors in combination to image. We need to seal the image with glue so it is always better to seal the image before color blending.I decided to use off white, green and blue shades of chalk paint. Here I want to repeat that for metal and glass like non porus surface, always use chalk paints. I always use sponge dauber to blend the colors. Always use lighter shades around the image and use dark shades gradually. I have used the same sponge to blend all the three colors simultaneously. I have done some dry brushing with copper and golden metallic color on the rim and handle of the bucket. On this bucket also, I have done some stamping with green and black archival inks. Different type of clear stamps are available at Connect4Sale to choose from. In the center I have used a sentiment stamp.

These sentiments stamps gives more meaning to our creations. Now it is time to seal the project with clear varnish. I have used Aquadur PU varnish. Always apply multiple coats of varnish to make your projects long lasting. A beautiful home décor piece is ready to adorn your home. It is so much fun to create something for our home. So what are you waiting for…create something unique to decorate your lovely home. Do not forget to share your beautiful creations with all of us.

About The Artist
Vidhu Thareja is a crafter from Noida, born and brought up in Delh. She had completed her studies from Delhi. She began her career as a freelance translator and worked with many reputed publications. She has also worked in the Insurance Sector for many years.
Due to personal reasons she had to give up her job, which actually turned out to be a blessing in disguise. The turning poing came when she got the golden opportunity to work with Madura Coats Pvt. Ltd. as a Craft Consultant for their Anchor Thread Craft activities in reputed schools of Delhi/ NCR Region. Although it was not a very high paying job it gave her all the confidence and a feeling of fulfillment, which made her realize the crafter hidden in her.
Since her childhood she was very much interested in crafts. Growing up, there was not that much exposure to tv or computer and she used to do embroidery in her free time or during vacations. Her biggest inspiration was her mother who is her motivating force. At the time of conducting Anchor thread craft workshops, she started doing DIY activities and decided to learn more.
From then there was no looking back and today she is doing what she loves to do. Although every new technique and art form attracts her but Decoupage and Sospeso are the two crafts, that she enjoys the most. She never lost a chance to learn anything new because she believes that learning never stops.
She follows her fellow crafters because she feels every person teaches you something. To all upcoming crafters she has this to say “That whatever you do, do it with love and passion, follow others but make your own style statement. Be confident but never be over-confident. Share your knowledge, that is what makes you grow”.
You can follow Vidhu Thareja on her Facebook and Instagram on the below mentioned links…
Vidhu’s Crafts – Making Crafts From Heart
https://www.instagram.com/vidhus_craft_handmade/
-
BEST PRICE -VALUE FOR MONEY
-
SHIPPING ALL OVER INDIA
-
BULK PRICING ON PRODUCTS
-
NEED HELP +91 9940134721


Leave a Reply
You must be logged in to post a comment.